In this article, we will create new Hugo website and deploy it on AWS and automate deployment process with gitlab CI.
Create a new Hugo website
If you already have created a website using Hugo then you can skip this section.
Installation process can be found on hugo quick start .
To create a new Hugo website we need to use Hugo CLI.
$ hugo new site myNewWebsite
And create a first post.
$ hugo new posts/my-post.md
For information about all CLI commands and file structure visit official Hugo documentation .
AWS account configuration
In this section, we are going to setup S3, IAM, and CloudFront.
Create Bucket
The Process of bucket creation is very simple, just follow steps in the Create bucket step form.
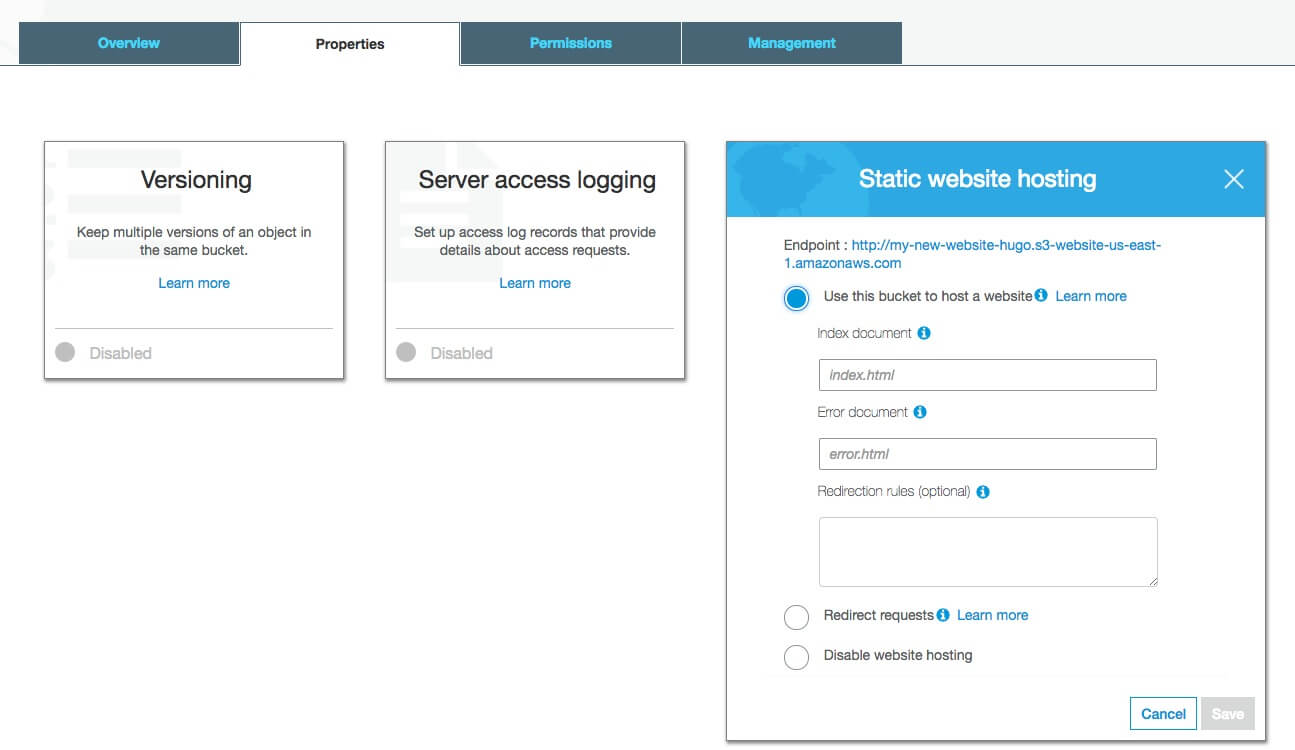
I will create a bucket with name my-new-website-hugo. Then we need to set up bucket access. In the Properties tab select Static website hosting and set Use this bucket to host a website. Input your index document. In our case, we have index.html.
Then we need to set up the bucket access policy. In the Permissions tab select Bucket policy and paste JSON configuration.
{
    "Version": "2012-10-17",
    "Statement": [
        {
            "Sid": "PublicReadGetObject",
            "Effect": "Allow",
            "Principal": "*",
            "Action": "s3:GetObject",
            "Resource": "arn:aws:s3:::my-new-website-hugo/*"
        }
    ]
}
This configuration will make bucket public.
Create IAM Policy
We need to create a new policy and then attach this policy to our gitlab-ci user.
In the Identity and Access Management (IAM) select Policies and click Create policy
Select JSON tab and paste the following configuration.
{
    "Version": "2012-10-17",
    "Statement": [
        {
            "Sid": "gitlabCIS3access0",
            "Effect": "Allow",
            "Action": [
                "s3:GetObject",
                "s3:PutObject",
                "s3:DeleteObject"
            ],
            "Resource": "arn:aws:s3:::my-new-website-hugo/*"
        },
        {
            "Sid": "gitlabCIS3access1",
            "Effect": "Allow",
            "Action": "s3:ListBucket",
            "Resource": "arn:aws:s3:::my-new-website-hugo"
        },
        {
            "Sid": "gitlabCIS3access2",
            "Effect": "Allow",
            "Action": [
                "cloudfront:CreateInvalidation",
                "cloudfront:GetInvalidation",
                "cloudfront:ListInvalidations"
            ],
            "Resource": "*"
        }
    ]
}
This configuration will grant CRUD access to the my-new-website-hugo bucket and allow gitlab ci to create CloudFront invalidation.
Create IAM User
In Users section click Add user.
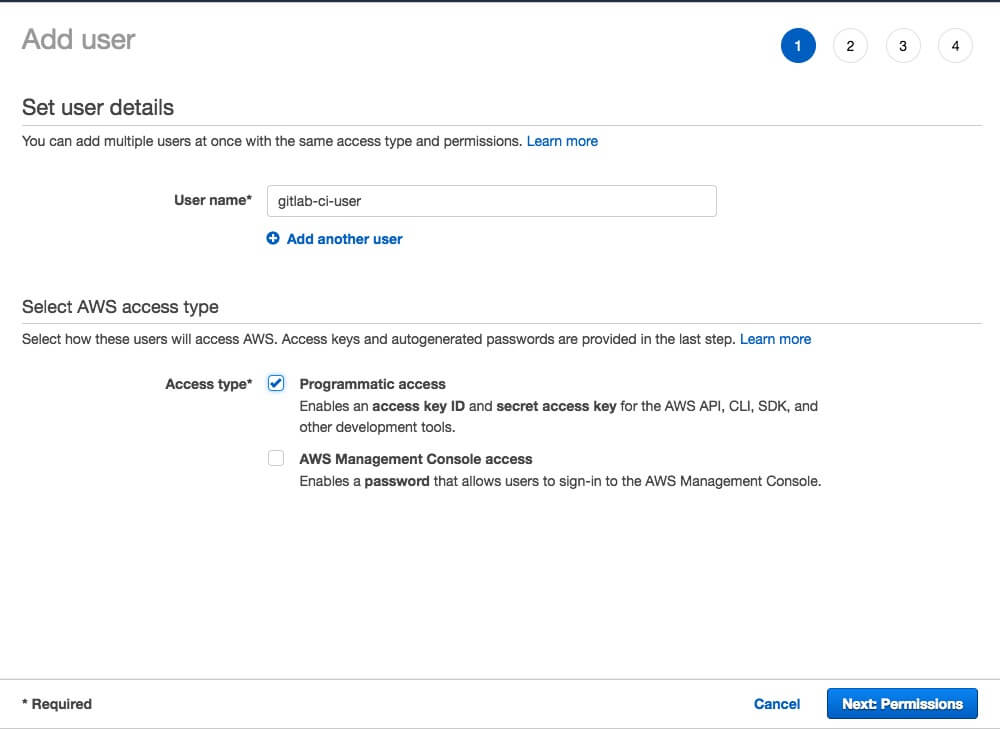
Type user name and select Programmatic access in Access type.
Then select Attach existing policies directly and find the policy that you have created for Gitlab CI.

After successfully created user you will have Access key ID and Secret access key. Which we will use in the gitlab to get access to AWS.
Create CloudFront Distribution
To create CloudFront Distribution click on Create distribution and fill in required fields.
In the Origin Domain Name paste your bucket endpoint. This endpoint can be found in S3 bucket properties in section Static website hosting.
Configure Gitlab CI
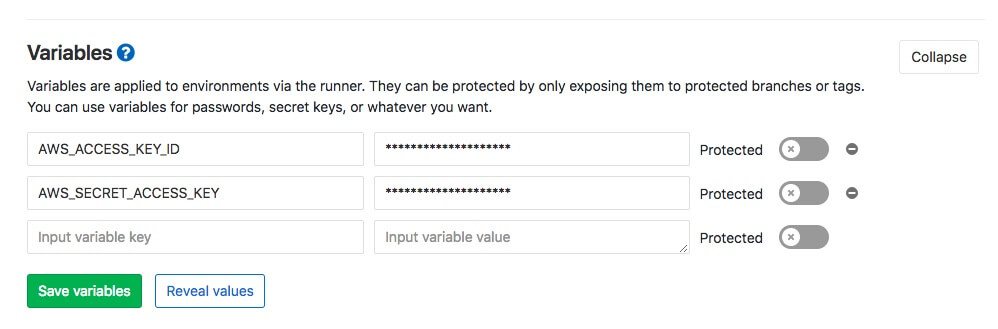
AWS keys configuration
First, we need set AWS_ACCESS_KEY_ID and AWS_SECRET_ACCESS_KEY. This keys we got when creating the user in IAM.
Create .gitlab-ci.yml in the root of your hugo website.
stages:
  - build
  - deploy

variables:
  AWS_DEFAULT_REGION: eu-central-1 # set your aws region
  BUCKET_NAME: my-new-website-hugo # change your bucket name
  CLOUDFRONT_DIST_ID: {ID} # paste your cloudFront distribution id
  GIT_SUBMODULE_STRATEGY: recursive

buildHugoSite:
  image: monachus/hugo
  stage: build
  script:
  - hugo
  artifacts:
    paths:
    - public
  only:
  - master

deploys3:
  image: garland/aws-cli-docker
  stage: deploy
  dependencies:
    - buildHugoSite
  script:
    - aws configure set preview.cloudfront true
    - aws s3 sync ./public s3://$BUCKET_NAME --delete;
    - aws cloudfront create-invalidation --distribution-id $CLOUDFRONT_DIST_ID  --paths "/*";
  only:
  - master
This config will create build and deploy stages. Ci only will be triggered if you push to master branch.
That’s all configuration we need. To see deployed website open you CloudFront distribution Domain Name or Bucket Endpoint.